Local Notifications in Flutter
Today we are going to implement local notifications in flutter application. We will learn that how to use local notifications in flutter. Let’s start it.
To display local notifications in flutter, we will use flutter_local_notifications plugin. This is a cross platform plugin for displaying local notifications in flutter applications.
First we will see a very simple example of flutter local notifications, without custom icon and custom sound.
Step 1 : Add package in pubspec.yaml
Add flutter_local_notifications package in pubspec.yaml, under dependencies section.
dependencies:
  flutter:
    sdk: flutter
  flutter_local_notifications: ^15.1.1
After this, run flutter pub get command in terminal.
Step 2 – Platform specific initializations
Override initState method and initialize Flutter notification settings in it.
1- First we will initialize settings for android.
var androidInitSettings =
    const AndroidInitializationSettings('@mipmap/ic_launcher');
This line creates an instance of the AndroidInitializationSettings class with the specified parameters. The const keyword is used to indicate that the object is a compile-time constant, which helps with optimization. The parameter @mipmap/ic_launcher is a reference to the launcher icon’s resource in the Android project. The @mipmap notation is used to access resources from the mipmap directory, which is commonly used for launcher icons.
3- Now we will initialize settings for IOS
var iosInitSettings = DarwinInitializationSettings(
    requestAlertPermission: true,
    requestBadgePermission: true,
    requestSoundPermission: true,
    onDidReceiveLocalNotification:
        (int id, String? title, String? body, String? payload) async {});
This line creates an instance of the DarwinInitializationSettings class with various parameters.
requestAlertPermission, requestBadgePermission, and requestSoundPermission: These boolean parameters indicate whether the app should request permission to display alerts, show badges, and play sounds for notifications, respectively. If set to true, the app will request these permissions when it first launches.
onDidReceiveLocalNotification: This parameter accepts a callback function that will be invoked when the app receives a local notification while it’s in the foreground. The function is asynchronous (async) and has four parameters: id, title, body, and payload. These parameters provide information about the received notification.
3- Combine android and IOS initializing settings
Now we will combine the android and IOS initializing settings using InitializationSettings Class.
var initializationSettings = InitializationSettings(
    android: androidInitSettings, iOS: iosInitSettings);
This line creates an instance of the InitializationSettings class. This class is used to hold the initialization settings for local notifications on both Android and iOS.
android: androidInitSettings: This parameter is set to the previously defined androidInitSettings object. This is the Android-specific initialization settings that we’ve created using the AndroidInitializationSettings class.
iOS: iosInitSettings: Similarly, this parameter is set to the previously defined iosInitSettings object. This is the iOS-specific initialization settings that we’ve created using the DarwinInitializationSettings class.
By combining the Android and iOS initialization settings using InitializationSettings, we’re preparing to use these settings to configure local notifications for both platforms.
4- Initialize FlutterLocalNotificationsPlugin
Declare an object of claas ‘FlutterLocalNotificationsPlugin’ in build method using late keyword.
late FlutterLocalNotificationsPlugin localNotificationsPlugin;Now in initState() method, initialize this object.
localNotificationsPlugin = FlutterLocalNotificationsPlugin();
localNotificationsPlugin.initialize(initializationSettings);
This line initializes the localNotificationsPlugin instance with the initializationSettings that we’ve previously defined. This step is crucial for configuring the plugin with the necessary settings for both Android and iOS platforms.
By performing these initialization steps, we’re setting up the foundation for handling local notifications in out Flutter app. After this, we would typically use methods provided by the FlutterLocalNotificationsPlugin class to schedule and display notifications based on the settings we’ve configured.
Step 3 – Display Local Notifications in Flutter
Now we will display local notification on tap on button.
1- Create a function ‘_showLocalNotificaion()’ and write code in it.
void _showLocalNotification() async {
var androidPlatformChannelSpecifics = AndroidNotificationDetails(
'notification_channel_id', 'channel_name',
importance: Importance.max, priority: Priority.high);
var iosPlatformChannelSpecifics = DarwinNotificationDetails();
var notificationDetails = NotificationDetails(
android: androidPlatformChannelSpecifics,
iOS: iosPlatformChannelSpecifics);
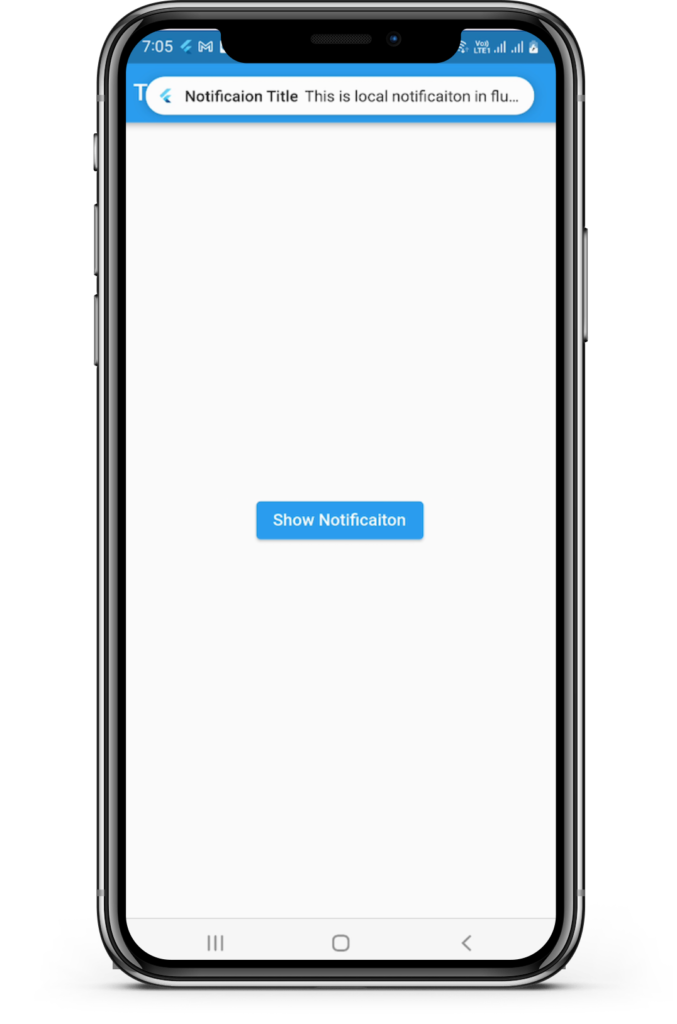
await localNotificationsPlugin.show(1, 'Notificaion Title',
'This is local notificaiton in flutter', notificationDetails);
}
2- Create an elevated button in screen and call this function in onTap of this button.
ElevatedButton(
    onPressed: () {
      _showLocalNotification();
    },
    child: Text('Show Notificaiton')),
Output :