Download image from Url and save in storage in Android Kotlin
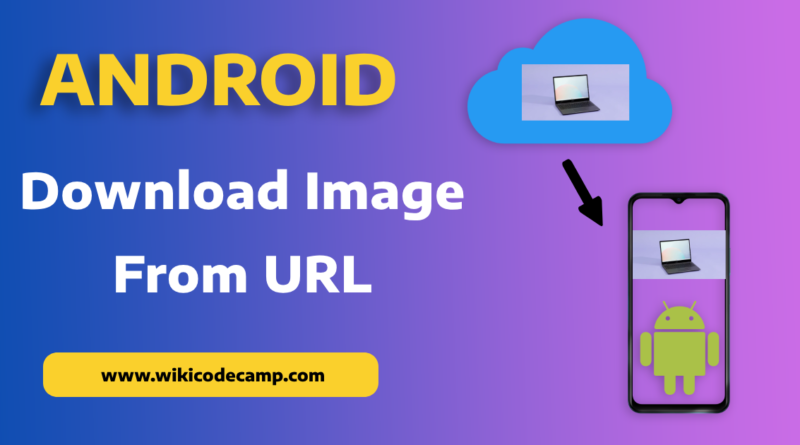
While developing mobile apps, a common scenario we often encounter is the need to download images from the internet and save them in local storage. For instance, suppose we’re developing a wallpapers app where users can download their preferred wallpaper and save it to their device’s gallery. Afterwards, they can access their gallery, select the downloaded image, and set it as their device’s wallpaper through the mobile’s display settings. Today we will learn how to download image from url and save it in local storage in android.
Note: Before proceeding further, I’d like to inform you that this tutorial utilizes the Kotlin programming language. As you may know, Kotlin is now the recommended programming language by Google for Android app development. Java has become less popular in the realm of Android app development, hence we’ll be using Kotlin exclusively in this tutorial.
Let’s start our work
Step 1: Declare permissions in Android manifest file
First step to download image from internet in android, is to declare the Internet permission in android manifest file. This is compulsory, because we are going to perform a task (Download image from url ) over internet. Each app that needs internet to perform any functionality in it, requires this permission. So add this line in manifest file.
<uses-permission android:name="android.permission.INTERNET" />Step 2 : Create Layout
We only intend to download image from Url, so our layout design will be extremely simple. We’ll create just one button. On click on this button, image downloading process will initiated. We won’t be adding anything else to our screen design beyond this.
<?xml version="1.0" encoding="utf-8"?>
<LinearLayout xmlns:android="http://schemas.android.com/apk/res/android"
    xmlns:tools="http://schemas.android.com/tools"
    android:layout_width="match_parent"
    android:layout_height="match_parent"
    android:gravity="center"
    android:padding="16dp"
    tools:context=".MainActivity">

    <Button
        android:id="@+id/btn_download"
        android:layout_width="match_parent"
        android:layout_height="wrap_content"
        android:text="Download Image" />

</LinearLayout>
Step 3 : Download Image From Url
Now, our actual task is beginning. Our goal was to download an image, and at this stage, this is what we are proceeding to do.
Remember, downloading the image from the internet is a network operation. In mobile apps, we utilize asynchronous programming for performing these network operations. This ensures that our network task runs in the background without blocking the main thread, thereby keeping the user interface and user experience smooth, free from interruptions caused by this network task.
As you know, in Java, we used the AsyncTask class for asynchronous tasks. However, in Kotlin, there’s a better method available for handling asynchronous tasks. Kotlin provides us with the convenience of coroutines, allowing us to perform our asynchronous tasks more effectively. You can read more about coroutines here.
Step 3a: Create a coroutine scope
We will create a coroutine scope with IO Dispatcher, because we are going to perform a network operation.
val scope = CoroutineScope(Dispatchers.IO)What is scope in coroutine:
In Kotlin, a coroutine scope is a structured way to manage the lifecycle of coroutines. It defines a specific context where coroutines can be launched and controlled.
What is dispatcher in coroutine
Dispatchers in Kotlin coroutines are essentially schedulers or contexts that determine the execution context of a coroutine. They define the thread or threads on which coroutines will run or be dispatched.
What is Dispatchers.IO in coroutine
It is designed for I/O-bound tasks like file or network operations. It’s optimized for disk or network input/output and uses a different thread pool to handle these operations efficiently without blocking the main thread.
Step 3b: Launch the coroutine scope
Now we will start a coroutine within a specified coroutine scope. As we have created a scope with IO dispatcher, we will run this coroutine in this way.
scope.launch {

}
Here we started our coroutine, now we will download image from url in this coroutine.
Step 3c: Download Image from Url
Let’s initiate the image downloading process within this coroutine to ensure that our main thread doesn’t get blocked.
val imageData = URL("image_url").readBytes()
val bitmap = BitmapFactory.decodeByteArray(imageData, 0, imageData.size)
These two lines of code will download image from url and convert it to bitmap.
URL().readyBytes(): It is a method used to read the contents of a URL as an array of bytes. It fetches the data from the specified URL and returns it as a byte array. This function is often used in networking or file handling operations to retrieve the content of a URL resource.
BitmapFactory.decodeByteArray(): It is a method used in Android development to create a Bitmap object from a byte array containing image data. This function takes in a byte array representing image data and decodes it into a Bitmap, which can then be used to display or manipulate the image within an Android application.
Step 4: Save image in storage
We have downloaded the image from url and converted it in bitmap. Now we will save this bitmap in gallery as image.
To save bitmap in gallery, we will use this function.
private fun saveBitmapToStorage(bitmap: Bitmap) {
    val filename = "my_image_${System.currentTimeMillis()}.jpg"
    var fos: OutputStream? = null
    if (Build.VERSION.SDK_INT >= Build.VERSION_CODES.Q) {

        contentResolver?.also { resolver ->
            val contentValues = ContentValues().apply {
                put(MediaStore.MediaColumns.DISPLAY_NAME, filename)
                put(MediaStore.MediaColumns.MIME_TYPE, "image/jpg")
                put(MediaStore.MediaColumns.RELATIVE_PATH, Environment.DIRECTORY_PICTURES)
            }
            val imageUri: Uri? =
                resolver.insert(MediaStore.Images.Media.EXTERNAL_CONTENT_URI, contentValues)
            fos = imageUri?.let { resolver.openOutputStream(it) }
        }
    } else {
        val imagesDir =
            Environment.getExternalStoragePublicDirectory(Environment.DIRECTORY_PICTURES)
        val image = File(imagesDir, filename)
        fos = FileOutputStream(image)
    }

    fos?.use {
        bitmap.compress(Bitmap.CompressFormat.JPEG, 100, it)

    }
}
This code considers the changes in storage handling introduced in Android Q, utilizing the MediaStore for newer versions and falling back to traditional file handling for older versions. It ultimately saves the compressed Bitmap image data into the specified location based on the Android version’s storage conventions. Check your gallery to find the downloaded image. It will be in Pictures directory in mobile’s storage.
Complete Code
package com.linearcode.andoriddemo

import android.content.ContentValues
import android.graphics.Bitmap
import android.graphics.BitmapFactory
import android.net.Uri
import android.os.Build
import android.os.Bundle
import android.os.Environment
import android.provider.MediaStore
import androidx.appcompat.app.AppCompatActivity
import com.linearcode.andoriddemo.databinding.ActivityMainBinding
import kotlinx.coroutines.CoroutineScope
import kotlinx.coroutines.Dispatchers
import kotlinx.coroutines.launch
import java.io.File
import java.io.FileOutputStream
import java.io.OutputStream
import java.net.URL

class MainActivity : AppCompatActivity() {
    lateinit var binding: ActivityMainBinding
     override fun onCreate(savedInstanceState: Bundle?) {
        super.onCreate(savedInstanceState)
        binding = ActivityMainBinding.inflate(layoutInflater)
        setContentView(binding.root)
        initViews()
    }

    fun initViews() {
        binding.btnDownload.setOnClickListener {
            val scope = CoroutineScope(Dispatchers.IO)

            // Launch a new coroutine in the scope

            scope.launch {
                val url =
                    URL("https://images.freeimages.com/images/large-previews/272/simple-apple-1327953.jpg")
                val imageData = URL("image_url").readBytes()
                val bitmap = BitmapFactory.decodeByteArray(imageData, 0, imageData.size)
                saveBitmapToStorage(bitmap)
            }
        }
    }

    private fun saveBitmapToStorage(bitmap: Bitmap) {
        val filename = "background_removed_${System.currentTimeMillis()}.jpg"
        var fos: OutputStream? = null
        if (Build.VERSION.SDK_INT >= Build.VERSION_CODES.Q) {

            contentResolver?.also { resolver ->
                val contentValues = ContentValues().apply {
                    put(MediaStore.MediaColumns.DISPLAY_NAME, filename)
                    put(MediaStore.MediaColumns.MIME_TYPE, "image/jpg")
                    put(MediaStore.MediaColumns.RELATIVE_PATH, Environment.DIRECTORY_PICTURES)
                }
                val imageUri: Uri? =
                    resolver.insert(MediaStore.Images.Media.EXTERNAL_CONTENT_URI, contentValues)
                fos = imageUri?.let { resolver.openOutputStream(it) }
            }
        } else {
            val imagesDir =
                Environment.getExternalStoragePublicDirectory(Environment.DIRECTORY_PICTURES)
            val image = File(imagesDir, filename)
            fos = FileOutputStream(image)
        }

        fos?.use {
            bitmap.compress(Bitmap.CompressFormat.JPEG, 100, it)
        }
    }
}

