Navigation using named routing in flutter
Every mobile app consists of multiple screens according to the requirement of user, through which a user can interact. Every mobile app consists of multiple screens according to the requirement of user, through which a user can interact. And user have to navigate through these screens to accomplish their tasks. Navigate to different screen of app is a core functionality of App. Although each app displays different types of information on different screens. For example an app contains the list of products on one page and on click of single product new page is opened with detail of the selected product. Here the routing between the list and detail page is required. In flutter we achieve this navigation using named routing.
Similarity with other platforms
As you know that in android we use activities to display these types of information and routing between these activities using the intents. And in IOS we use ViewControllers. On the same pattern flutter has the routes that are equivalent of the activities in android and ViewControllers in IOS. And these routes are called the widgets. In flutter we need to navigate between these routes.
Navigation methods in flutter
In flutter, there is very simple and common way to navigate between two routes is to use Navigator.push method. This push method takes two parameters. First one is context and other one is MaterialPageRoute in which we write the second page name on which we have to navigate. This method adds a new route in the stack of routes of flutter App that is managed by the Navigator.
1- Simple page routing example
Let’s see an example of this simple page routing.
Create two routes FirstRoute and SecondRoute. These routes are the statefull widgets. We will navigate from FirstRoute to SecondRoute and will come back to FirstRoute. In the FirstRoute screen, create a button on which we will press and navigate to the SecondRoute.
Code
onPressed: () {
  Navigator.push(
    context,
    MaterialPageRoute(builder: (context) => SecondRoute()),
  );
}
This is the basic way of routing between pages in flutter.
2- Named Routing in flutter
Now let’s see another easy way of routing between pages, which is called navigate through named routes. This is the simplest way of navigate to different screens. Now we will explore this naming concept of routing.
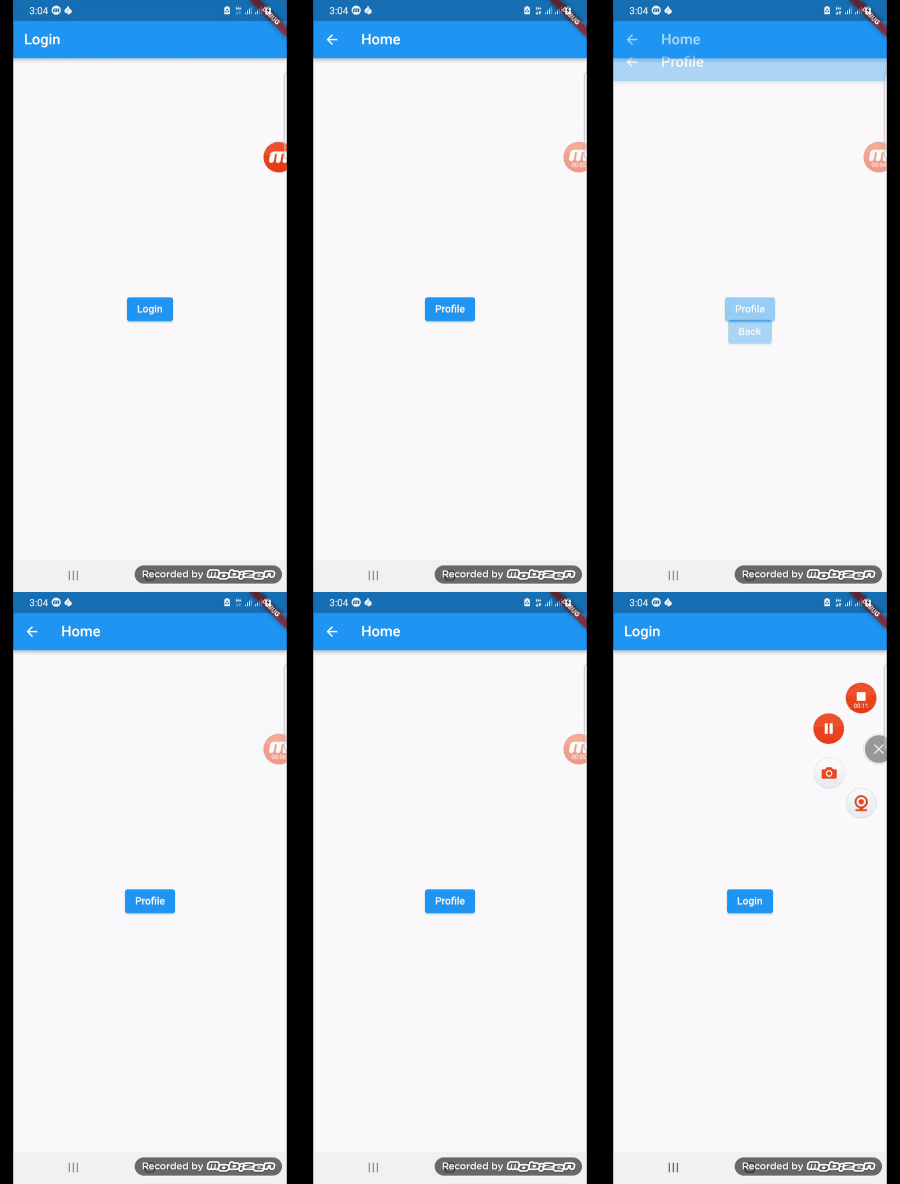
First of all we will create simple three routes, ( LoginScreen, HomeScreen and ProfileScreen). These pages will be very simple with containing only single buttons. We will start form LoginScreen.
Create a routes.dart file and create a Routes class like this.
class Routes{
static const loginScreen='/login';
static const homeScreen='/home';
static const profileScreen='/profile';

}
In Routes class, define all routes of your app.
Edit main.dart like this.
class MyApp extends StatelessWidget {
  const MyApp({Key? key}) : super(key: key);

  @override
  Widget build(BuildContext context) {
    return MaterialApp(
        title: 'Flutter Demo',
        theme: ThemeData(
          primarySwatch: Colors.blue,
        ),
        // home: const LoginScreen(),
        initialRoute: Routes.loginScreen,
        routes: {
          Routes.loginScreen: (context) => const LoginScreen(),
          Routes.homeScreen: (context) => const HomeScreen(),
          Routes.profileScreen: (context) => const ProfileScreen(),
        });
  }
}
In MaterialApp widget write the initial route of app. Here we define the login screen as initial route. When we will run our app it will start from Login Screen. Our first screen will be the login screen. In routes property we have define all other routes of App and map the pages with routes. For example when we will call the homescreen route, HomeScreen will open.
Login Screen
Now create login screen with login button.
login_screen.dart
class LoginScreen extends StatefulWidget {
  const LoginScreen({Key? key}) : super(key: key);

  @override
  _LoginScreenState createState() => _LoginScreenState();
}

class _LoginScreenState extends State<LoginScreen> {
  List<Product> products = [];

  @override
  Widget build(BuildContext context) {
    return Scaffold(
        appBar: AppBar(
          title: const Text('List'),
        ),
        body: Center(
          child: ElevatedButton(
            onPressed: () {
              Navigator.pushNamed(context, Routes.homeScreen);
            },
            child: const Text('Login'),
          ),
        ));
  }
We created a login screen with only one button in center of screen. This is the initial route of our App. So when we will run our app we will see this login screen at first. On click on login button we have called the home screen route. This will navigate to the home screen.
HomeScreen
Now create home_screen
Home_screen.dart
class HomeScreen extends StatefulWidget {
  const HomeScreen({Key? key}) : super(key: key);

  @override
  _HomeScreenState createState() => _HomeScreenState();
}

class _HomeScreenState extends State<HomeScreen> {
  @override
  Widget build(BuildContext context) {
    return Scaffold(
      appBar: AppBar(
        title: const Text('Home'),
      ),
      body: Center(
        child: ElevatedButton(
          onPressed: () {
            Navigator.pushNamed(context, Routes.profileScreen);
          },
          child: const Text('Profile'),
        ),
      ),
    );
  }
}
Here we created a home screen with a single button, on click on this button it will navigate to profile screen.
Profile Screen
Now create profile_screen.dart
profile_scree.dart
class ProfileScreen extends StatefulWidget {
  const ProfileScreen({Key? key}) : super(key: key);

  @override
  _ProfileScreenState createState() => _ProfileScreenState();
}

class _ProfileScreenState extends State<ProfileScreen> {
  @override
  Widget build(BuildContext context) {
    return Scaffold(
      appBar: AppBar(
        title: const Text('Profile'),
      ),
      body: Center(
        child: ElevatedButton(
          onPressed: () {
            Navigator.pop(context);
          },
          child: const Text('Back'),
        ),
      ),
    );
  }
}
Here we created a profile screen with a button, on click on this button we have finished this page and go back to previous screen using Navigation.pop function.
DEMO


